Step-by-Step Guide: Creating a Maintenance View in SAP ABAP
- JKS Learning

- Feb 7, 2024
- 3 min read
In order to maintain the data across several tables, the maintenance view must be defined on two or more tables. It makes it easier for us to maintain the intricate application objects.
Multiple tables can be combined into a single unit, but there needs to be a foreign key link between the tables.
It enables us to read and manage the table's data.
The information found in multiple tables comes together to form a logical unit that serves as the user's application object. We may see, edit, and maintain the data of such application objects simultaneously with the aid of a maintenance view.
All tables in the maintenance view have to be connected by a foreign key, hence the join condition has to come from the
The foreign key links the fields F2 and F4 of tables 1 and 2, as shown in the diagram above. Likewise, the foreign key connects the fields F5 and F6 in tables 2 and 3. These three tables are used to build the maintenance view, which pulls information from the F1, F2, F3, F5, and F8 fields.
Creating Maintenance View in ABAP:
Step 1: Use the menu path or the command field to input the transaction code SE11 to access the data dictionary's beginning screen.
Step 2: Select the checkbox adjacent to the View After giving the view a name, select the Create button from the menu.
Step 3: All the views will display in a pop-up window; choose the "Maintenance view" and click the Copy
The Dictionary: Maintain View Screen Appears
Step 4: Fill in the "Short Description" area with a brief text that explains your point of view. For example, making a maintenance view for testing or an example of a maintenance view.
Step 5: The primary table name for viewing should be entered under the Table column after selecting the Table/Join Conditions tab.
Step 6: Hover your cursor over the primary table name and select the Relationships option.
Step 7: Select the box next to the table name.
Step 8: The secondary table will be selected when you click the copy button.
Step 9: Enter the conditions under the selection conditions tab. (If necessary). We are not offering any selection criteria in this case.
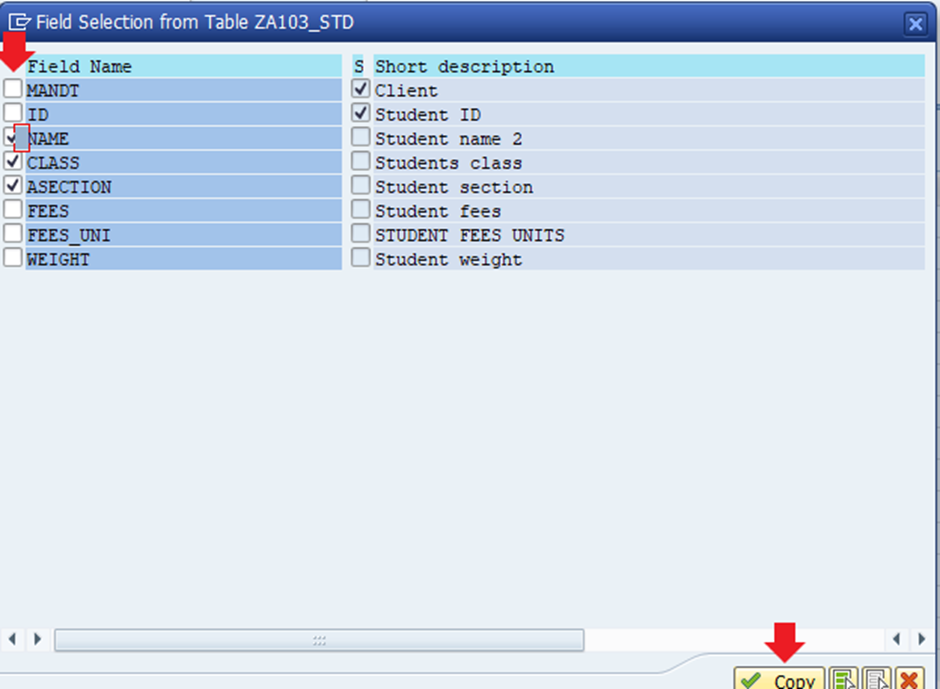
Step 10: Select the field from each table (main and secondary) by going to the View fields tab and clicking the Table Fields button.
Follow the same steps for the secondary table (ZA103_STD), and all of the fields that you have chosen will be shown in the view field column.
Step 11: Select the relevant radio button by going to the Maint. Status tab. As seen in the image below, select the remaining fields:
Step 12: As seen in the diagram below, navigate to the Utilities> Table Maintenance Generator.
After entering the information as the arrow indicates, save it.
Step 13: Select Save and store the view either under a package or as a local object. We're going to store it as a local object here. After verifying for any discrepancies, turn on the view.
Step 14: Click on utilities > Contents now. You will be able to read, edit, and write data on a new screen that appears.
The name GANDHI NAGAR has been successfully changed to KITTU in this instance. Take a look at the picture below:
Advantages of Maintenance view:
It is quicker to extract the necessary data from multiple tables with the aid of a maintenance view than it is to select data from a single table.
Maintaining multiple tables concurrently is more efficient than maintaining each one separately, which takes time.


Comments